Showing posts with label tutorial. Show all posts

Tuesday, 26 May 2015

You rang?

Hello! If you've popped over from the 'gram, as us cool kids like to call it, looking for the box pouch tutorial, and you're new, there some things you need to know.

Firstly, the box pouch tutorial was written in March 2009, when I first figured out how to make these suckers after an interesting accident with a smally furry animal, a bottle of wine and MGF Kaz from the Hunter Valley.

Secondly, it was the first tutorial I'd ever written and I may rewrite it, depending on any feedback.

Thirdly, this blog is almost deaddybones, so if you want me to keep writing, some feedback would be nice.  Just sayin'.

The link is here... Enjoy.

PS The tutorial assumes you know how to make a zipper sandwich.  If you don't know how, there are two really good tutorials, here, and here.  Both these tutorials assume you don't want to line your pouch, invisibly or otherwise, which is fine.  If you want to stop there, you can!


Sunday, 15 February 2015

Little Miss Muffet sat down on her tuffet

Eating her curds and whey
Along came a spider
who sat down beside her
Which cause-ed Miss Muffet to say
"Rack off hairy legs"

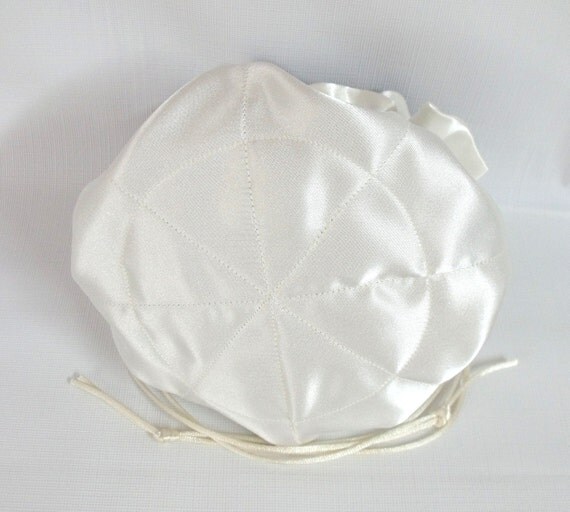
OK, now that the fun part is over, here's a quick breakdown on how to make one of these super-cute Miss Muffet bags (and of course if you can't be arsed making one, this shop on Etsy has loads, beautifully ready made).

I've made a few over the years:


And they had the interior pocket, which adds only a little bit of complexity to the making, plus a little bit of time.  I've written two sets of instructions here, Option One is for the bag with the padded lining, and Option Two is for the bag with the inner pockets. 

You will need:

Approximately half a yard/half a metre of focus material
Approximately half a yard/half a metre of lining material
A piece of batting or quilted calico roughly 12"/ 30 cm
A big plate, with a diameter of roughly 14"/36 cm
A slightly smaller plate, roughly 10"/25 cm in diameter (any smaller and the pockets will be too small to be useful)

Sewing Notions
Pins
Thread
A button to use in the buttonhole foot (if your foot needs one)
Ribbon, approximately 60"/152 cm
Tape measure
Hem Guide
Washout pen
A buttonhole foot for your sewing machine.

Outer bag:

With the washout pen, draw a circle round your big plate on the focus fabric:


Cut out.

Fold in half across the centre and measure down 1"/2.54 cm from the raw edge at 12 o'clock on the circle, then mark the top of the buttonhole.  

Mark again at 6 o'clock on the circle, 1"/2.54 cm from the raw edge.  

Open the circle out flat again, and change to your buttonhole foot.  Make two buttonholes, one at the mark at 12 o'clock on the circle, and one at the market at 6 o'clock.  Cut the buttonholes open very carefully.

Tip:  You don't want the buttonholes to be too close to the top of the bag, and they don't need to be more then 3/8"/1 cm wide, but can be bigger depending on what size ribbon you want to use.

With the washout pen, draw a circle round your big plate on your lining fabric and cut out one lining.  

At this point you can either make Option One, the Padded lining, or Option Two, the Pockets.   Whichever bag you make, you need to cut one focus and one lining of the biggest size.

Options:

Option One:  Padded lining:

Draw round the smaller plate with the washout pen onto the quilted calico or batting & cut out one batting circle.


Pin the wrong side of the lining fabric to the wrong side of the batting, being careful to find the centres* of both pieces of material, and quilt to taste.   


I recommend quilting all the way to the edges of the lining piece, not just on the batting piece.  This gives a nicer finish.  


For the quilting, I cheat & use the diamond grid already on the quilted calico, but you can use any quilting pattern, or just straight lines.


Once you've got your lining piece nicely quilted, you should have two circles the same size, one focus and one lining, with the lining piece being nicely quilted.  Press, then follow the 'Joining it together' instructions.

Option Two:  Inner Pockets (not recommended if you're doing the padded lining)

Follow the 'Joining it Together' instructions to turn your focus and lining large outer circles into one.

With the remaining fabric, draw round the smaller plate on the focus and lining fabrics, with the washout pen, and then cut out one lining and one focus circle.  Follow the 'Joining it together' steps to turn your two smaller pieces into one.  Press them both.

When finished, you'll have two pressed circles, one large for the outside, and one smaller for the inside.  

Place the circles so that the lining faces are both up.  Match the centres*, and pin the two pieces together.  With a ruler, draw lines from 12-6 o'clock, 2 o'clock-8 o'clock, 3 o'clock-9 o'clock and 4 o'clock-10 o'clock, which will give you eight pockets:  


With a stitch size of 3 mm, sew very carefully from the outer edge of the lining piece of your bag,  one line for each pocket.  Make sure your lines intersect tidily:


Picture copyright of Edie Castle

Be careful not to stitch over the buttonholes or the ribbon channel, and add some reinforcing stitches at the top of each pocket section.

Joining it together 

You will do this twice if you've made the inner pockets (Option Two), or just once if you've made the padded option (Option One).

At any point on the edge of the focus piece, place pins 2"/5cm apart, and stitch between the pins with a 1/8"/3mm seam allowance.  Remove the pins & repeat this on the lining piece.  This is the turning hole, and the stitching will give you a nice line to follow when you press the edges in.


Pin the two pieces together right sides together, making sure you match the centres*. Stitch the two pieces together around the top, with a 1/4"/6mm seam allowance.  

Leave a gap where your stitching indicates the turning hole should be.  Press the edges of the turning gap in, following your stitching line.


Turn the whole thing right sides out through your turning gap, and top-stitch round the outer edge, enclosing your turning gap in the top-stitching:


Use a 3mm stitch size for the top-stitching and a contrasting thread, if you want.

Making the ribbon channel (do this regardless of which option you choose).

Move your hem guide marker down to 1"/2.5cm, and place it next to the top of the buttonhole at 12 o'clock.  Stitch all the way round the circle, holding the hem guide in place. Be sure to pass across the top of the buttonhole at 6 o'clock, and come back to the 12 o'clock buttonhole.    


Moving your hem guide marker down to align with the bottom of the 12 o'clock buttonhole.  Stitch all the way round the circle, being sure to pass across the bottom of the buttonhole at 6 o'clock.


You now have a channel between the lining and the focus fabrics, which you can thread your ribbon into.  I use a quilting safety pin, because they're robust and bent nicely, but you can use a bodkin, a nappy pin or anything that will safety get your ribbon all the way round your bag.    

Tip:  To calculate the length of ribbon required to go round the bag, multiply the diameter of the inner circle of the ribbon channel by 22 and divide by 7. To go round twice, double that length.

One piece of ribbon should start and finish at the 12 o'clock buttonhole, and one piece of ribbon should start and finish at the 6 o'clock buttonhole.  Knot the ends carefully to make sure they can't pull out.  Even if they disappear into the bag, if you've knotted them, you can just pull them round to the buttonholes again.

Finished!


*To find the centre - fold your fabric in half, then in half again.  This will give you a piece of fabric the same shape as a piece of pizza, but not so tasty.  The centre is the pointy bit.  Stick a pin through the centre to mark it.

Tuesday, 14 December 2010

Journal Cover Tutorial

This will work for any size journal - be careful with your measurements and write them down!!  Caveat - if your journal is less than 6"/15.25cm wide, you will need to adjust the size of your flaps!


Measuring:
Measure your journal from the front cover, moving left round the spine to the back cover.  Do not include the pages at the front.  This measurement is the width.
Measure your journal from top to bottom.  This measurement is the height.


Fabric cutting:
For your focus fabric, add 6"/15.25 cm to the width and 1"/2.54cm to the height.  If your journal is 12" X 6", cut your focus fabric 18"/45.75cm X 7"/17.80cm.


For your lining fabric, add 1"/2.54cm to the width, and 1"/2.54cm to the height.  If your journal is 12" X 6", cut your lining fabric 13" X 7".


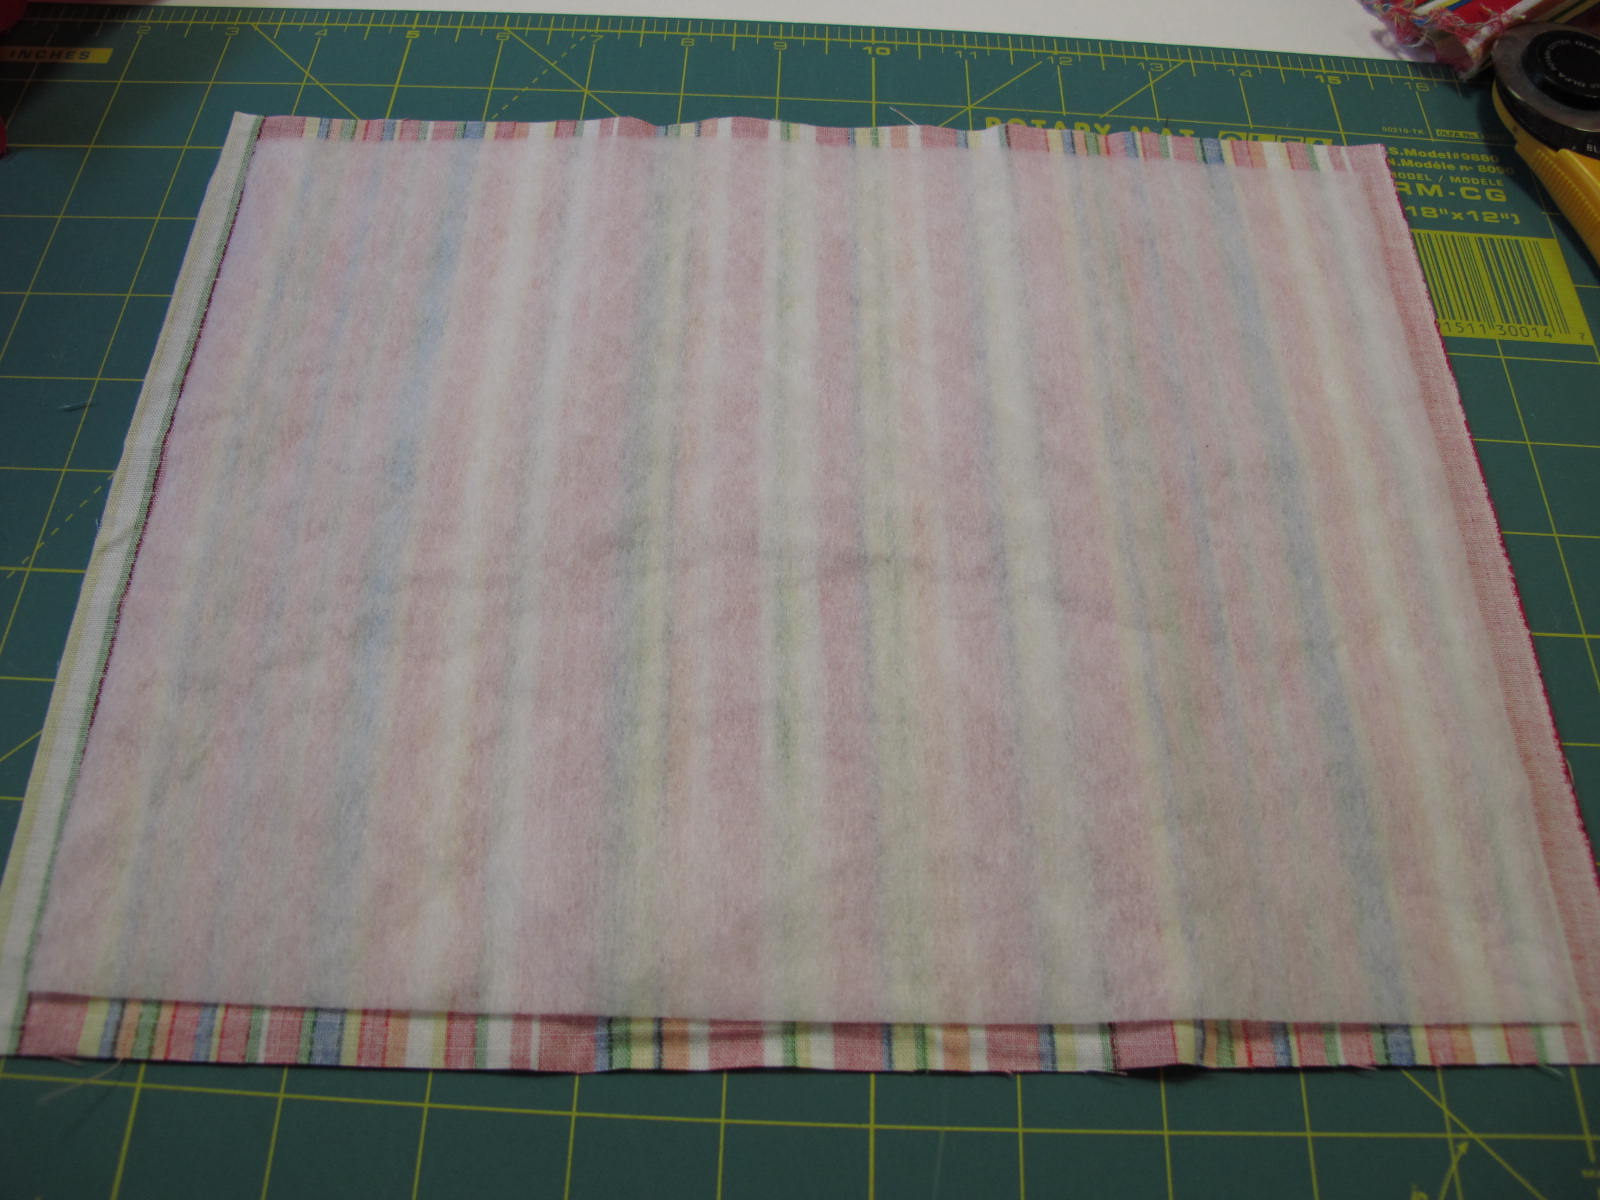
For the batting, I used iron-on pellon to make it less bulky, and also easier to work with.  I try to cut the pellon 1/2" or 1/4" smaller all round than the width and height of the journal so you don't have bulky seams.  I ironed the pellon on to the lining fabric.  Using slightly smaller sized iron-on pellon also makes it easier to find and align the centres of the focus and lining fabrics when you are constructing.


Put 1/4"/6mm (1/2"/12mm total) double seams on the flap ends, and 1/4"/6mm single seams on the lining ends.  If you want to have double seams on the lining ends, it's your call but it's not really necessary (unless you're the Peppermint Penguin, who will probably turn the cover inside out to see how it was done!).


If you want to decorate the cover, do it before you sew anything.  Make sure you mark the dimensions of the cover with washout pen, so you don't lose any of the decoration into the spine or the flaps:


The first two of these I made required additional stitching at the bottom as I was over-careful and left too much room - the fit should be snug.  If it's so tight once it's finished that it lifts the cover, put an elastic band round the cover for a couple of days until the fabric stretches to fit (which it will).  


Making up:


Wrap the focus fabric round the journal, and mark at the top (with washout pen) where the flaps sit.  Make sure the flaps are evenly distributed around the book, you don't want one to be huge & the other one tiny.  


Find and mark the centre of the focus fabric.  Pin the flaps into place, RS together.  Find & mark the centre of the lining, then place your lining fabric RS down on top of the (WS up) flaps, aligning the centre marks.  You will have three layers - lining, flaps, focus.  Pin all into place, and sew with a generous 1/4"/6mm seam allowance, all the way across the top.  


If you want to add a ribbon bookmark, do it before you sew it up.  I recommend putting it on the back (the RHS of the cover), but again, it's your call.  Make sure it's long enough to come out the bottom, otherwise there's no point.


Turn the cover out, and check for fit.  Poke your flap corners out with a point turner or knitting needle, taking care not to stick holes in your cover.  Your flaps should now be RS out, your lining & focus should be WS together, with the bottom seam open.


Insert the journal, pin for fit, then take it out.  If you want, you can mark the entire stitching line in wash-out marker.  Stitch the bottom seam:


Be careful not to catch your bookmark in the bottom seam, unless you are using elastic (hey!  Great idea!) and you want it caught!  You should now have a tube.  


As you can see here, the lining is ever so slightly larger than the cover.  Not sure why this happened, but you can cheat like I did; just pink off the ends (very annoying if you've made the effort to double-seam them!) to make them the same size.  The lining should be either exactly the same finished size as your cover (without the flaps), or just smaller.  


Turn it all out, through the opening in the tube.  Insert your journal again, taking care not to bend its covers, and check for fit.  This journal is a bit tricky in that it has rounded corners, but it didn't affect the overall fit.


Remove journal again (d'oh), press carefully, re-insert journal, wrap beautifully and hand to lucky recipient.


Questions?  Comments?  More info?  Less info?  Tell all, Gentle Readers.  I'd love to see your finished items... 


Ciao!

Sunday, 15 March 2009

Oops, my heart went oops

Let me just say at the outset that, despite having worked as a trainer, I always forget just how much work is involved in showing people how to do something. I just made a box pouch, the last one of the eight I was making for my WMIL, and took 44, yep, 44 photographs... That makes it sound complicated, but trust me, it's not, I just wanted it to be really clear... so, my first instruction is, read this all the way through before starting, just like an exam. There are some good hints there which will make life easier for you.

After re-reading this, I've decided to simplify it by assuming you all know how to make a zip sandwich and a box pouch already.  If you don't, check out this excellent tutorial on zipper sandwiches and this one on Box Pouches. 

Hints:

  • This pouch was made using 6.5" X 4.5" or 16.5 X 11.45cm rectangles.  Don't make your first pouch much smaller than this, it becomes way too fiddly.
  • If you are putting a label inside the pouch, either stitch it to your lining fabric before you stitch anything to anything else, or after you've attached your lining and focus fabric to your zip, otherwise you'll have to do it by hand through the hole in the lining!
  • I always use iron-on interfacing on my focus fabric, it helps to maintain the shape and makes it easier to work with.
  • Make it easy on yourself by using a much bigger zipper than you need, 9"/22cm zippers are great for 6.5" pouches, that way you can gnore the zipper pull altogether. Leave it at the top of the zip and start stitching below it.
  • When you put your zipper in, make sure the cut-out bit of your zip foot is resting on top of the zip. That's what it's for, to help you get as close as possible to your zip.
  • If you are putting pull tabs or ribbon at the ends of your pouch to make it easy to open and close, stitch them to the right side edges of the focus fabric after sewing up the bottom seam. They go at the point where the side seam and bottom seam meet, right on top of the zipper.  It's much easier than trying to hold it all together when you come to stitch the side seams. Make sure the tabs have enough length in case you have to trim the side seams to straighten the pouch out.
  • If you want to top-stitch or decorate the bottom of your pouch, first stitch the seam, then do the decoration before you stitch the lining seam. It's much easier to do this way because you don't have to try and avoid the zipper, and the space is much larger.  Try it the other way and you'll see what I mean!
  • I recommend at least a 90/14 needle to help you sew over the zipper comfortably.  Anything smaller will probably break.
  • If you're making a bigger bag, use bigger corner angles.  Remember that whatever size corner angles you use will effectively be doubled once you form your corners.  If you have a 1/2" cutout, you will get 1" corners.  If you use a 1" cutout, you will get 2" corners.  It's the old "sum of the square of the hypotenuse" thing from school (half plus half equals one, one plus one equals two etc) 
  • Be careful!  If you make a 6.5" bag and use 1" corner angles, your pouch will be square, not a rectangle.  It will still be cute though.
  • If your side seams start to open where you have cut the corner angles out, it's okay to stitch over them again.
Okay, so let's get started.

We have assumed here that you have already stitched your focus, zip and lining together to make a zipper sandwich, and that you've top-stitched the zip to make it look nice and to stop the fabric from getting caught in the zipper.

This is the Most Important Thing! When you stitch the bottom seam of your lining fabric, leave a big gap (big is a relative term - big enough to turn the pouch inside out through) in the middle of the seam. Reinforce the stitches on either side of the gap, because this is where you will pull the entire bag right-sides out:


Assemble the pouch so you have two tubes, with your bottom seams centred over the zip.   Stitch in your ribbon pulls or tabs now, right where the side seam meets the zip.  Make sure you put them on the inside, having raw edges even.

Next, stitch across the side seams, but make sure the zipper pull is inside the pouch.  I like to pin the end without the pull together to make sure the opening isn't too big.  Do some double stitching over the zipper itself, because this is where all the pulling happens.


Again, making sure you haven't stitched the zipper pull on the outside, trim off the ends of the zipper.  You should have a small box looking like this:  


You can still get into the box from the lining side, which looks exactly like this, only with the lining fabric showing.

Now, this is where the good bit comes in!  Take your quilting ruler, or anything you can use to mark off a half-inch/1.27 cm square.  You must do this from the focus fabric side, because that is the side which is seen when the bag is finished.  Place your ruler on the side seam, and align it with the edge of the pouch:

Mark the corner angle with a pencil or wash-out marking pen: 
  

Snip out the half-inch square.  Note that one side will be longer than the other because you have to cut off all the edge after the seam stitching.  If you don't believe me, trim off the fabric after the seam; it will then definitely be a half-inch square :-) 

You will end up with your pouch looking like this:

Flip the pouch over and reach inside the pouch, via the gap in your lining fabric; open the zipper all the way down.  This makes it easier to move the bag around when you are making the corner angles.

Okay, now the fiddly bit. You need to take the angles and bring them round, or open them out, so that the 90° angles you had are now gone, and you have a nicely horizontal edge.  Some of you older people may remember the "sides to middle" repair we used to do on sheets that had torn - it's the same principle.  You are pushing the sideseam towards the middle of the bag, wrapping the corners round.  These are your perpendicular corners. 

The edges should match up, but it doesn't matter too much if they're not 100%, 95% is fine.   It is fiddly, and I find that a bit of spit on my fingers helps to make the fabric move more easily.  See here:


Pull the angles outwards so that they become flat:


You will need to do this for all four corners.  A bit of shuffling makes the corners more accessible, don't be afraid to manipulate the bag to give you easier access to the corners.  The first few times you do this you will find it very fiddly.  Keep manipulating the fabric until you've got all four edges (two outside, and two lining) all lined up.

Once you have one end aligned, pin and stitch them.  Don't wait until you've got all four pinned before stitching, because it's harder to  stitch if they're all pinned up - moving the bag is constrained by the pins. 

This is what it looks like in progress:


Once you've stitched all four, your bag will look like this:


I recommend turning the bag right sides out now through the hole in your lining fabric, to check that you've caught all your edges in the stitching.  There's nothing more frustrating than thinking you've got it all in and then blam!  A gap!  Pull it through the hole gently, a bit at a time.  Remember that you have to pull two pouches through, the lining one and the focus fabric one, so be gentle. 

Check your lining seams:


You should be able to see your magic half-inch slice has turned into a magic inch seam. 

Once you've got it all okay, turn it back inside out again and zigzag over the seams. This way you won't be unpicking the zigzag if it isn't right.

Okay, so now it should be perfect. Turn it right-sides out again but don't press yet, because you still need to stitch up the hole in your lining.  You can either handstitch it invisibly, leaving no clue as to how you made this excellent pouch, or you can be lazy like I am and machine stitch it closed:


The finished pouch should look something like this:


Now go and press it and go and have a glass of excellent Hunter Valley Semillon and a good lie down!  Phew! 


Thanks are due to the following excellent tutorials for leading me to the water jump, and stimulating my brain on how to get over it without flinching:   

Firstly, twelve22 - her no-fuss approach to zips in pouches helped me with the zipper sandwich - love it.

Secondly, three bears showed me how to get the box shape, and how fiddly it was to get those corners perpendicular without using a ruler, or something else, which led me to...

Twenty Acres and no sheep - she provided me with the excellent idea of using a quilting ruler to get the corners right.

The rest of it I came up with on my own.  Please feel free to use this, and spread it around.  If you have any questions, please post and I will try to answer them.  Or, if you think it isn't clear enough, especially round what to do with the corners, please let me know.  I may have to go to YouTube.  Scary.


Ciao!