Sunday 6 September 2015

Barbara Walker's Triple Leaf a la me

Cast on 21 sts
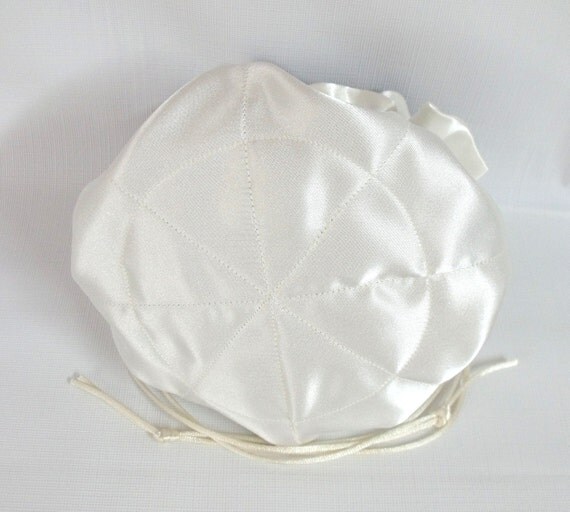
Knit some rows of moss to suit

Pattern:
R1 and all odd rows:  moss 3, pearl, moss 3
R2: K1, yo, k2tog, k3tog, (yo k1) x 3, yo, k3 tog tbl, ssk, yo, k1
R4: k1, yo, k3 tog, yo, k7, yo, k3 tog tbl, yo, k1
R6: k1, yo, k2tog, yo, k1, yo, k2, sl2 k-wise, k1, p2sso, k2, yo, k1, yo, ssk, yo, k1
R8: k1, yo, k2tog, yo, k3, yo, k1, sl2 k-wise, k1, p2sso, k1, yo, k3, yo, ssk, yo, k1
R10: k1, yo, (k2 tog) X 2, k3, yo, sl2kw, k1, p2sso, yo, k3, (ssk twice), yo, k1
R12: k1, yo, (k 2tog)  x 3 , (k1, yo) x 2, k1, (ssk x 3), yo, k1


Glossary: 

Ssk - slip slip knit - slip a stitch knitwise onto the rh needle, then slip a second one, then insert the lh needle into the front of the stitches on the rh needle and knit as normal.

This lovely pattern is from Barbara Walker's second Treasury of Patterns... For @thelittleredhen08.  Enjoy.

Tuesday 26 May 2015

You rang?

Hello! If you've popped over from the 'gram, as us cool kids like to call it, looking for the box pouch tutorial, and you're new, there some things you need to know.

Firstly, the box pouch tutorial was written in March 2009, when I first figured out how to make these suckers after an interesting accident with a smally furry animal, a bottle of wine and MGF Kaz from the Hunter Valley.

Secondly, it was the first tutorial I'd ever written and I may rewrite it, depending on any feedback.

Thirdly, this blog is almost deaddybones, so if you want me to keep writing, some feedback would be nice.  Just sayin'.

The link is here... Enjoy.

PS The tutorial assumes you know how to make a zipper sandwich.  If you don't know how, there are two really good tutorials, here, and here.  Both these tutorials assume you don't want to line your pouch, invisibly or otherwise, which is fine.  If you want to stop there, you can!


Sunday 15 February 2015

Little Miss Muffet sat down on her tuffet

Eating her curds and whey
Along came a spider
who sat down beside her
Which cause-ed Miss Muffet to say
"Rack off hairy legs"

OK, now that the fun part is over, here's a quick breakdown on how to make one of these super-cute Miss Muffet bags (and of course if you can't be arsed making one, this shop on Etsy has loads, beautifully ready made).

I've made a few over the years:


And they had the interior pocket, which adds only a little bit of complexity to the making, plus a little bit of time.  I've written two sets of instructions here, Option One is for the bag with the padded lining, and Option Two is for the bag with the inner pockets. 

You will need:

Approximately half a yard/half a metre of focus material
Approximately half a yard/half a metre of lining material
A piece of batting or quilted calico roughly 12"/ 30 cm
A big plate, with a diameter of roughly 14"/36 cm
A slightly smaller plate, roughly 10"/25 cm in diameter (any smaller and the pockets will be too small to be useful)

Sewing Notions
Pins
Thread
A button to use in the buttonhole foot (if your foot needs one)
Ribbon, approximately 60"/152 cm
Tape measure
Hem Guide
Washout pen
A buttonhole foot for your sewing machine.

Outer bag:

With the washout pen, draw a circle round your big plate on the focus fabric:


Cut out.

Fold in half across the centre and measure down 1"/2.54 cm from the raw edge at 12 o'clock on the circle, then mark the top of the buttonhole.  

Mark again at 6 o'clock on the circle, 1"/2.54 cm from the raw edge.  

Open the circle out flat again, and change to your buttonhole foot.  Make two buttonholes, one at the mark at 12 o'clock on the circle, and one at the market at 6 o'clock.  Cut the buttonholes open very carefully.

Tip:  You don't want the buttonholes to be too close to the top of the bag, and they don't need to be more then 3/8"/1 cm wide, but can be bigger depending on what size ribbon you want to use.

With the washout pen, draw a circle round your big plate on your lining fabric and cut out one lining.  

At this point you can either make Option One, the Padded lining, or Option Two, the Pockets.   Whichever bag you make, you need to cut one focus and one lining of the biggest size.

Options:

Option One:  Padded lining:

Draw round the smaller plate with the washout pen onto the quilted calico or batting & cut out one batting circle.


Pin the wrong side of the lining fabric to the wrong side of the batting, being careful to find the centres* of both pieces of material, and quilt to taste.   


I recommend quilting all the way to the edges of the lining piece, not just on the batting piece.  This gives a nicer finish.  


For the quilting, I cheat & use the diamond grid already on the quilted calico, but you can use any quilting pattern, or just straight lines.


Once you've got your lining piece nicely quilted, you should have two circles the same size, one focus and one lining, with the lining piece being nicely quilted.  Press, then follow the 'Joining it together' instructions.

Option Two:  Inner Pockets (not recommended if you're doing the padded lining)

Follow the 'Joining it Together' instructions to turn your focus and lining large outer circles into one.

With the remaining fabric, draw round the smaller plate on the focus and lining fabrics, with the washout pen, and then cut out one lining and one focus circle.  Follow the 'Joining it together' steps to turn your two smaller pieces into one.  Press them both.

When finished, you'll have two pressed circles, one large for the outside, and one smaller for the inside.  

Place the circles so that the lining faces are both up.  Match the centres*, and pin the two pieces together.  With a ruler, draw lines from 12-6 o'clock, 2 o'clock-8 o'clock, 3 o'clock-9 o'clock and 4 o'clock-10 o'clock, which will give you eight pockets:  


With a stitch size of 3 mm, sew very carefully from the outer edge of the lining piece of your bag,  one line for each pocket.  Make sure your lines intersect tidily:


Picture copyright of Edie Castle

Be careful not to stitch over the buttonholes or the ribbon channel, and add some reinforcing stitches at the top of each pocket section.

Joining it together 

You will do this twice if you've made the inner pockets (Option Two), or just once if you've made the padded option (Option One).

At any point on the edge of the focus piece, place pins 2"/5cm apart, and stitch between the pins with a 1/8"/3mm seam allowance.  Remove the pins & repeat this on the lining piece.  This is the turning hole, and the stitching will give you a nice line to follow when you press the edges in.


Pin the two pieces together right sides together, making sure you match the centres*. Stitch the two pieces together around the top, with a 1/4"/6mm seam allowance.  

Leave a gap where your stitching indicates the turning hole should be.  Press the edges of the turning gap in, following your stitching line.


Turn the whole thing right sides out through your turning gap, and top-stitch round the outer edge, enclosing your turning gap in the top-stitching:


Use a 3mm stitch size for the top-stitching and a contrasting thread, if you want.

Making the ribbon channel (do this regardless of which option you choose).

Move your hem guide marker down to 1"/2.5cm, and place it next to the top of the buttonhole at 12 o'clock.  Stitch all the way round the circle, holding the hem guide in place. Be sure to pass across the top of the buttonhole at 6 o'clock, and come back to the 12 o'clock buttonhole.    


Moving your hem guide marker down to align with the bottom of the 12 o'clock buttonhole.  Stitch all the way round the circle, being sure to pass across the bottom of the buttonhole at 6 o'clock.


You now have a channel between the lining and the focus fabrics, which you can thread your ribbon into.  I use a quilting safety pin, because they're robust and bent nicely, but you can use a bodkin, a nappy pin or anything that will safety get your ribbon all the way round your bag.    

Tip:  To calculate the length of ribbon required to go round the bag, multiply the diameter of the inner circle of the ribbon channel by 22 and divide by 7. To go round twice, double that length.

One piece of ribbon should start and finish at the 12 o'clock buttonhole, and one piece of ribbon should start and finish at the 6 o'clock buttonhole.  Knot the ends carefully to make sure they can't pull out.  Even if they disappear into the bag, if you've knotted them, you can just pull them round to the buttonholes again.

Finished!


*To find the centre - fold your fabric in half, then in half again.  This will give you a piece of fabric the same shape as a piece of pizza, but not so tasty.  The centre is the pointy bit.  Stick a pin through the centre to mark it.

Wednesday 11 February 2015

Holy spitballs, how did it get to be February?

I feel very naughty, Gentle Readers, for having neglected you for so long, but, yanno, life...

I've been extremely busy with Instragram, and have had much more success in luring the innocent and unworldly into following my doings, such as they have been...

Let's see... I took a complete copy of my Lovely Ma's photo archive after she died, and I've been slowly culling all the duplicated photos - clever though she was with some things, she never quite grasped the concept of 'don't need to copy things more than once', so some pictures appear four, five, six, seven times... it's a bit tedious, but I've been posting some of the better ones of her Quilts on Instragram (photos, that is) - the quilts are fabulous but the photos are just crap.  I think it was because she was so impatient with the digital camera, she never quite gave it enough time to focus, and nearly every photo is blurry...

Scrap Quilt, Nanga 2004

Although this one makes me a liar, of course... Like most of Mum's quilts, I think this one went to Tonee, her very good friend from the Telfer days, but I'm not really sure.  It's good that there's no shortage in our house or I'd be hunting them down.

I wanted to post a picture of my all-time favourite, Sarah Johnson, which was made very much in the traditional colours, (not usually my favourite), but I can't find one that does it justice - it's all hand-quilted, with needle-turn applique and it's on our bed all the time:


In other news, I've made some animals, and things are so disorganised I haven't even set up the 2015 Crafting folder... here's some pics I dragged over from the phone:

Liberty-Belle, the Birthday Bilby

Hi, I'm Jumpy

I'm a secret Bilby
And I've just made a Miss Muffet bag for my lovely friend Grace to give her Mother, not quite traditional because she wanted it padded and no inside compartments, so I cheated again and used quilted calico inside the lining - so easy - but I'm very happy with the way it came out, and I love the colour combination (such good taste my friends have):


The very lovely Alison from Cotton_Factory (my go-to fabric store these days) has asked for the pattern details - I feel like a bit of a cheat, this pattern has been around for at least 200 years (remember Lucy Locket who lost her pocket?), but hey!  I'm willing!  I'll post it here as a tutorial if anybody is interested.

Finally, I've signed up for three (OMG what was I thinking) craft swaps - the #igpincushionswap, the #nerdscraftitbetter swap (both due in May), and a #payitforward one which has some random date, to be determine by the Swap Commander-In-Chief.

And now, Gentle Readers, having watched three episodes of Season 4 of Breaking Bad (OMG How Good Is It!!), investigated 37 pincushion patterns, eaten dinner, put the groceries away, shifted 972 photos from my phone to my PC, played 8 games of scrabble on my tablet, liked 37,372, 459 photos on Instagram and done precisely zero craft since I got home at 5.45, I must away to bed.  

Ciao!